

30 DIY Nail Art
Do you want to have killer nails all the time? Are you tired of your bland coats of polish and want to add a little pizzazz to them? For those who are tired of a few coats of OPI, we have found the best nail art tutorials for all levels – who said nail art had to be hard?
1Ombré Chevron Print
This look is easy and achievable in just 6 steps! This is great for beginners, and the ombré adds a bit of sparkle. You could also try this with metallic polishes – pinks and golds would work a dream! Use a chevron-patterned vinyl to do this design and stick it on your fingernail before painting your chosen colors on a makeup sponge and dabbing them onto your nail. See, how simple was that?!
2Tape Treat

Tape is a cheaper way of doing particular designs if you don’t fancy getting vinyls. Just cut the tape into the shapes you want. The possibilities are endless – from swirls to triangles, you will always find something inventive to do! Our particular favorite is the swirl, which would also work for a cute ice-cream inspired design – cut small thin bits of tape and layer them in a fan-like shape, so that all the ends meet, paint over the bits of tape and once the polish is dry, carefully lift off the tape.
3Precious Stone

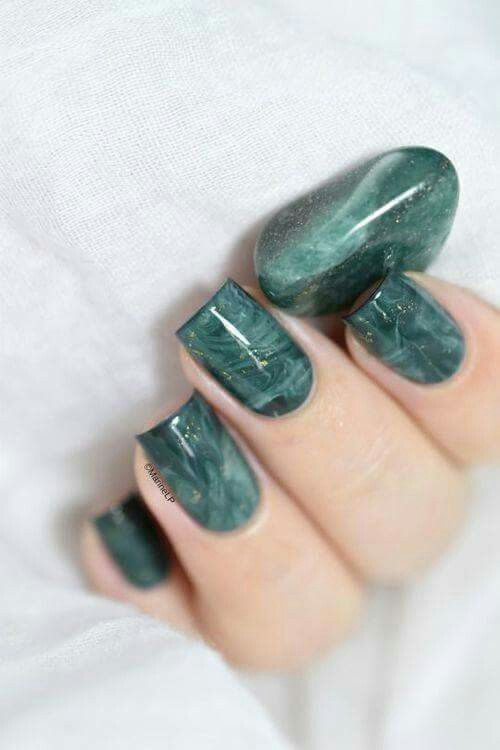
This stone-inspired design is a great spin on the marble effect often used by beauty bloggers. It is super realistic and makes your nails look like they are, in fact, in stone.
Here is how to get the look!
1) Start off with a black base coat, and use a peel off nail polish (available on Amazon) to make sure you don’t get the other polishes all over your fingers!
2) Dab little bits of nail polish onto a sponge of a slightly lighter color, so here, dark green, and in between those dots.
3) Do the same thing with a shade that is a lot lighter, like this almost pastel green color we can see in the picture.
4) Then with a color that is in between to two previous shades, do the same thing, dab blobs of nail polish between the small spaces left. Then with a needle, mix it all by creating a swirl-like pattern.
5) Dip a glass stamper into the polish and press it on your nails, and peel off the peel off polish you had put on in step 1.
6) Last but not least, add a little bit of gold polish for a bit of glitz and glamor! And of course, a transparent top coat.
4Braided Nails – The Easy Way
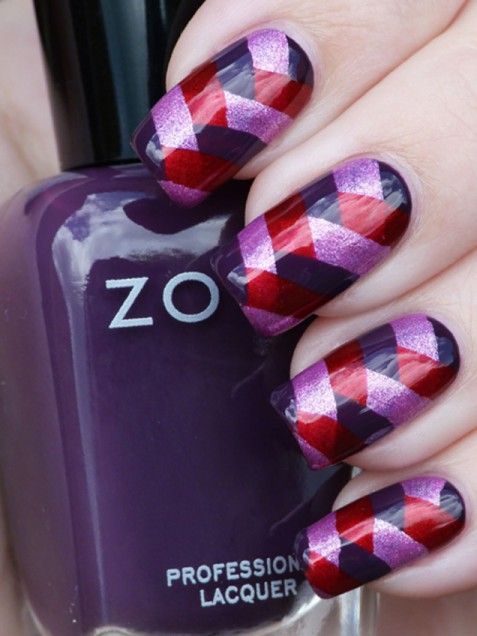
Braided nails can be so hard to do, but this tutorial will show you how to do it easily. Using purple adds a girly touch and can look great with a monochrome outfit.
1) Use a light-colored base coat to compliment the rest of your color scheme, here, lavender is being used. Apply it to your nails.
2) Layer different bits of tape diagonally across the nail. Obviously, also add tape on the parts you want to keep lavender.
3) Use metallic purple polishes on the non-tape parts, a light one and a dark one if you want a striking contrast, and finish off with top coat!
Simple as that!
5Glitter Goals

Glitter is a makeup must-have at the moment – not just your nails, but eyes, and even glittery highlighters! Be on trend with this cute nail art idea, it is the easiest one to do and it is perfect for special occasions! You will need a nail polish of the color of your choice, a transparent polish, nail glue, peel off polish and glitter. Chose one nail you want to have glitter on and apply the peel off polish around the fingernail before using the nail glue. Then, dip your fingernail into the glitter. Once dry, take off the peel off polish with some tweezers. The Born Pretty store has lots of nail glitter and sequins for you to use!
6Wild Side
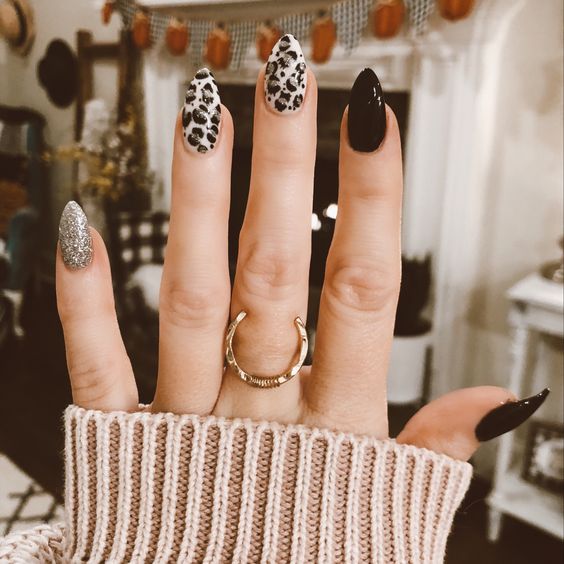
Leopard print isn’t aging, or inappropriate. Worn correctly, it can add a glam rock edge to your look! Make two blobs of polish and use the darkest of the two for the outline of the leopard print. Make lots of dots on your nail, for example, in gold, but pastel pink could look cute too, and then outline them with the darkest color. We also recommend trying metallic polishes for a bit more of a chic look!
7Reverse French Tip
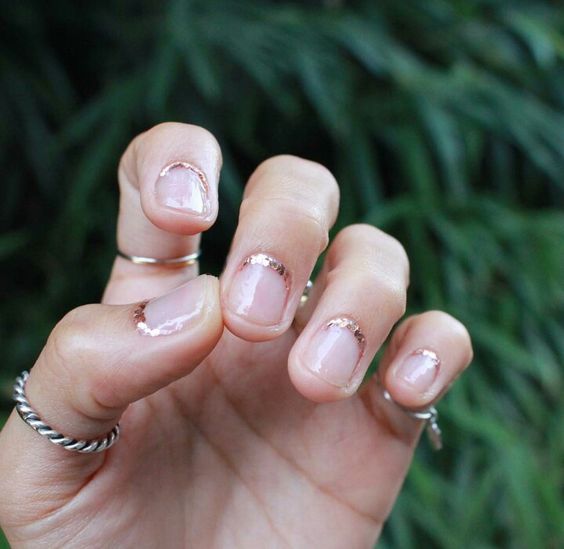
This nail art is part of the more sophisticated of the list! You will, of course, need two colors. We love these metallic shades but pastel pink and lilac could look lush too!
1) Take the shade you want for the manicure part, apply it to your nails and let them dry.
2) Then, grab your main shade and paint over the nail, leaving a curvy shape on the side, imitating the shape of your nail.
3) Finally, add a top coat once everything is dry and voilà!
8Fishnet Fave
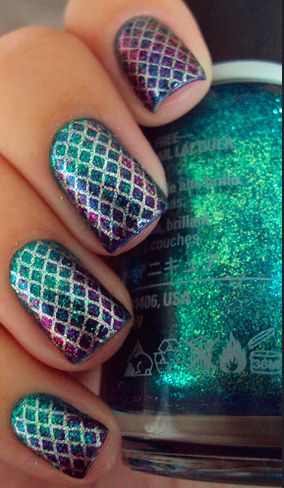
Fishnet tights are back in, and you have to inject the trend into your look somehow! Too afraid to try the tights? Well, take a baby step with this nail art idea! It is so easy, and you have the main tool in your home, a loofah! Stretch the material across your fingernail and apply black nail polish over the top, and there you have it! A sexy yet simple nail art design! Add a black tip and you’re ready to go!
9Dotty About Dots
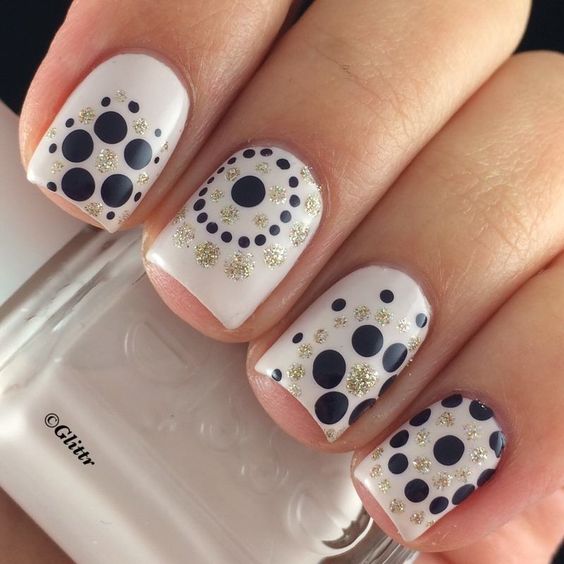
How do you get dots that are that even, I hear you ask? Well, it is simple – use a bobby pin! It seems obvious now, but it is an inventive idea, and saves you from splurging on nail kits! We love the base coat here too, it is cool and fresh for the warmer months ahead – use Essie’s Turquoise & Caicos for the base!
10Ombré Braiding

You will need striping tape to get this small and thin criss-cross effect. Then chose 5 polishes of a particular color that go from the lightest to the darkest.
1) Paint your base coat white.
2) Layer the different bits of tape, laying them one crossing the other, and then paint the different sections from the lightest to the darkest.
3) Take off the tape once it is dry, and add a transparent top coat to conceal your design!
11Ice Cream Delight
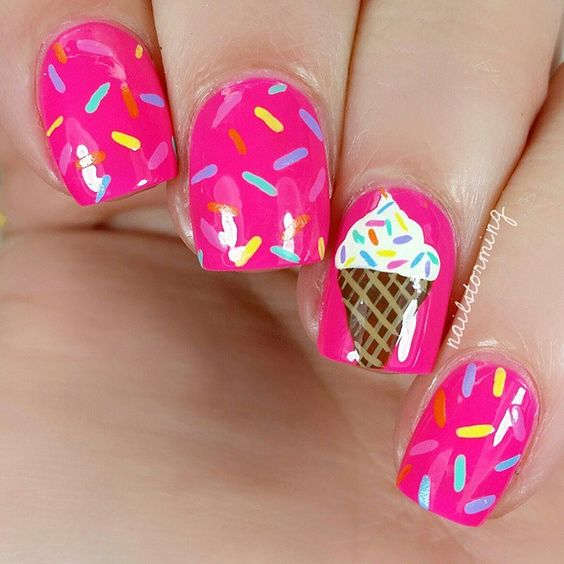
Ice cream has been there for us when others haven’t – so show the love by doing this cute nail design. With the brush from the first nail polish, do three strokes, one shorter than the other, aiming towards the end of the nail, and repeat this step with two other polishes, so simple, yet pretty and perfect for any occasion!
12Floral Fun

If you have a steady hand then try this jaw-dropping design! Get your hands on striping tape and a dotting tool or a small brush to carefully draw on these delicate patterns. This looks great with an almond-shaped nail!
13Lace Love
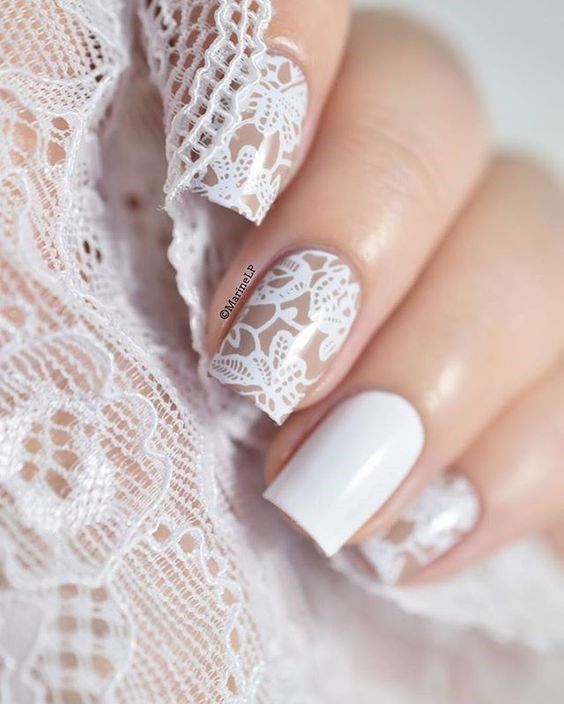
Lace is sexy, feminine and oozes sophistication. It may be fiddly to do, but boy is it worth your time and patience.
1) Cut the lace into the shape you want, so this can be the shape of your nail or a half oval if you want to put a spin on your French manicure!
2) Paint your fingernails with a base coat, do this twice.
3) Add a clear coat, and whilst it is still wet, apply the lace as quickly as you can, and press down without smudging the other layers.
4) Add another clear coat to protect the lace as well as the nail. This will also prevent it catching on your clothes and ripping it off – ouch!
5) Trim the lace if there are bits poking out.
14Winter Comforts

Embrace the colder times ahead and go full-on winter with this nail art design. You will need either nail transfers or a snowflake-themed decal kit, we recommend Snail Vinyls’ Snowflake set, along with OPI’s baby pink shade It’s a Girl!, their taupe color, Taupe-less Beach and their Funny Bunny white.
1) Apply the pink and taupe polishes to your nails. We love the twist here with only two nails that are baby pink, that still manage to bring a bit of brightness to your fingers! Wait until your nails dry.
2) Put the stencil of your choice on your nail and paint over it with the Funny Bunny polish. Repeat this step with the nails you want snowflakes on.
3) Add a top coat and there you have it! Simple, girly and wintery!
15Meow!
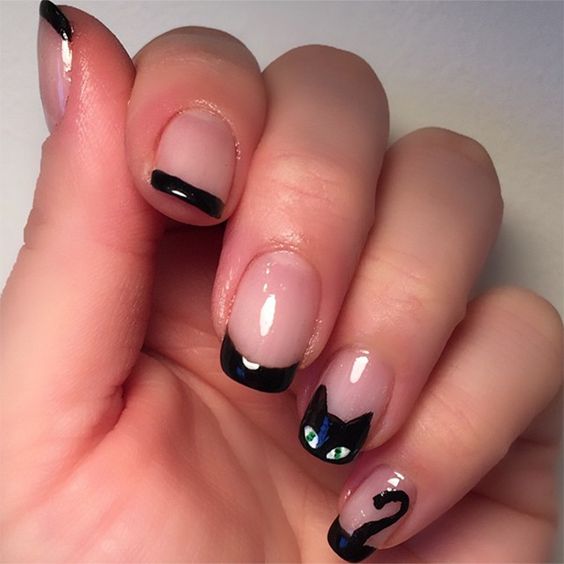
For the cat-lady or for Halloween, here is a fun black cat design you can try! All you need is a nail brush, and we have a kit just for you! Look out for Bourgeois’ Multi Brush Nail Art set with a brush and several heads to use on them so your details are spot-on.
1) On both sides of your tips, draw two lines that imitate the curve of your nails in a black polish.
2) Join them up to create an oval-shape, obviously, this is going to be the head.
3) With a white polish, dab two little dots for the eyes. Go back to your black polish and add the pupils.
4) Finally, add a transparent top coat to keep your design concealed.
16Gorgeous Gifts
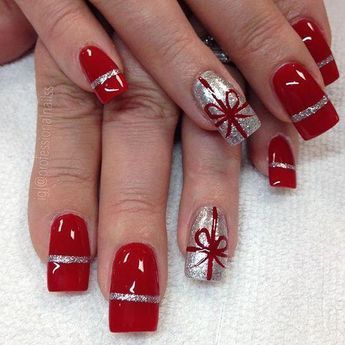
We love presents, even on our nails! This is an ideal design for a birthday or for Christmas! It is super simple and a novel nail design for a special occasion.
1) Pick three colors, color 1 will be your base, color 2 the color of the present and color 3 of the ribbon.
2) Paint your nails with color 1. Once dry, use tape to obtain a square at the tip of your nail.
3) Apply color 2 to the square that isn’t taped off.
4) Get a small nail art brush or a dotting tool to draw the ribbon on, using color 3, then outline the ribbon with the color of your base (1).
5) Finally, once all that is dry, add the top coat to finish off the look.
17Out Of This World
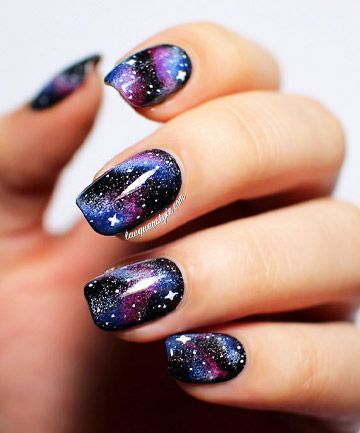
To be fair, if you are skeptical of galaxy nails, it is understandable. You don’t want to look immature, or as if you are following the crowd. We recommend darker, less girly colors for a mature take on the galaxy print. Here is how you get the look:
1) Prepare your nails and make sure everything is smooth and even. Add a clear coat to protect and seal the nail.
2) Paint the background color – we recommend a deep dark color like black, emerald green or blue.
3) Add small specks of glittery nail varnish to create an effect of distant stars. No big flecks allowed! The more discreet, the better here!
4) Chose your galaxy colors – find a picture and chose the two to three colors that you like, galaxies can be of any shade really!
5) Cut a tiny bit of sponge off and with some tweezers, dab the colors on one by one with the sponge.
6) Cover the nail with a transparent polish with a hint of glitter in it, then add slightly bigger glitter chunks.
7) With a nail art brush or a dotting tool, add small white specks to create an impression of distance.
8) Finally, once it is all dry, add a coat of transparent polish to protect the layers.
18Diamante Diva

Rhinestones are a great addition to your nails! You can’t beat a bit of glamor! For this tutorial, you will need your trusty transparent polish, two polishes and some nail jewels/charms. If you want to replicate this particular look, you should get your hands (or nails) on Essie’s Bahama Mama from their Pro Color collection for this oxblood color, and Dior’s Cosmopolite 785 for this dusty pink color. For the nail charms, though the choice is yours, check out Daily Charme’s oval crystal cluster charms, and their decorated rhombus gems.
1) First, paint the nails that you don’t want the gems on with Essie’s Bahama Mama (or the color of your choice).
2) Once that is dry, apply Cosmopolite 785 to the other nails. Apply 2 coats, and whilst the second is still wet, apply the gem and press down for it to stick.
3) Once it is dry, paint over the whole nail (gem included) with your transparent polish.
4) And there you have it, the perfect party look!
19Quite Quilted


Quilted nails are the perfect way to integrating winter knits into your nail art! All you will need your color of choice, a transparent polish, and striping tape.
1) First, apply the color of choice, we would choose Where’s My Chauffeur by Essie, because it’s a brilliant nude pink color, that will look classy and feminine.
2) Once the second coat is dry, create a criss-cross pattern with the striping tape, and paint over the top with the same color.
3) After your nails have dried, add a transparent coat of polish. Simple as that!
20Super Sprinkles

For this donut-inspired nail art, you will need Butter London’s Flusher Blusher polish for the base, and China Glaze’s Happy Go Lucky, Kiwi Cool-Ada and Make Some Noise for the sprinkles. Let’s get started!
1) First, paint your nails with the base color of your choice. Here, a bright pink has been used, which is why we chose Flusher Blusher. You could also do this in brown for a chocolate donut inspired look.
2) Once your coats are dry, use a small nail art brush to draw strokes of 3 colors, so here, the colors we chose from China Glaze, or if you want smaller sprinkles, use a dotting tool.
3) Last but not least, add a transparent coat to create a sort of glazed effect, so your nails are good enough to eat!
21In Awe Of Ombre
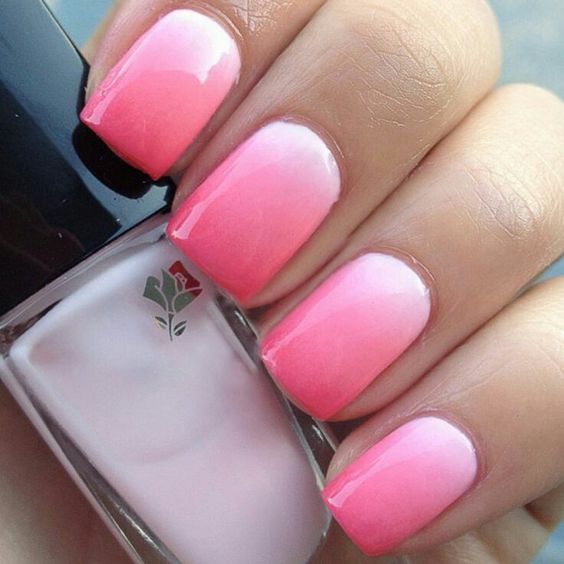
Ombre is not just fashionable for your hair and your makeup, but now your nails! For this tutorial, you will need to tones of the same color. To get this look, get Dior’s shades Bonheur 661 and Transform-La-La 155.
1) Prepare your nails before applying a thin clear coat on all your nails.
2) Paint several layers of base coat over your nails – if you want your nails to dry quicker, apply two thin layers of polish instead one thick one.
3) Paint your ombre colors in straight horizontal lines onto a sponge. The width of the sponge should be that of your nail. The first color should be lighter than the second. Normally, two or three colors are chosen to create an ombre look. Dip the sponge in water before use.
4) Stamp the colors onto your nails by rolling the sponge from one nail to the other without lifting the sponge – you will get nail varnish over your fingers but you can get this off by using a Q-Tip and nail polish remover.
5) Finally, add a top coat of clear polish.
22Shine Bright
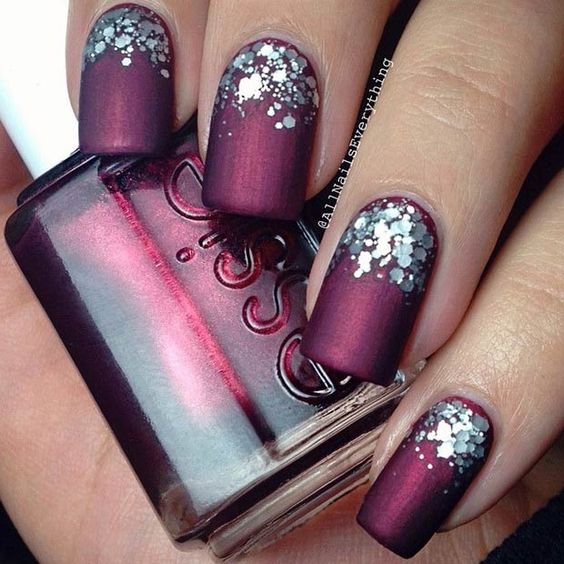
If full-on glitter is a bit too over the top for your liking, then, slowly and surely add a bit of glitter into your life with this design. All you will need are some glitter chunks (check out the Born Pretty Store), some tweezers, and for this particular look, a striking matte polish, like Urban Outfitter’s Matte Nail Polish. At 10$ for 3, they are a bargain!
1) Paint your base, we would go for this burgundy color from Urban Outfitters.
2) While the second coat is still wet, take some tweezers and pick up the glitter chunks individually, creating a U-shape with them, imitating the curve of the nail.
3) Once this is done, add a transparent top coat to protect the different layers.
23Victorian Rose
For the artists with a steady hand, this is a design that needs patience but will definitely get hearts racing. It is so beautiful, feminine and incorporates two hot trends – pastel colors and floral patterns. For this tutorial, you should look out for a pale blue shade, like Nailberry’s Hope, for the rose petals, their shade, In Love, and for the leaves Burberry’s Iconic Colour Nail Polish in Dark Bottle Green 423. Look at the step by step guide to perfect the look!
24Parisian Chic
If you are a romantic, or dream of a Parisian getaway, then try out this girly pink design. This would look great with a white top and light blue jeans. This is perfect for everyday or for a special trip away! If you are lucky enough to get whisked off to Paris, then this is definitely a manicure you will have to try for yourself! Check out the step by step guide above to finding out how to get the look!
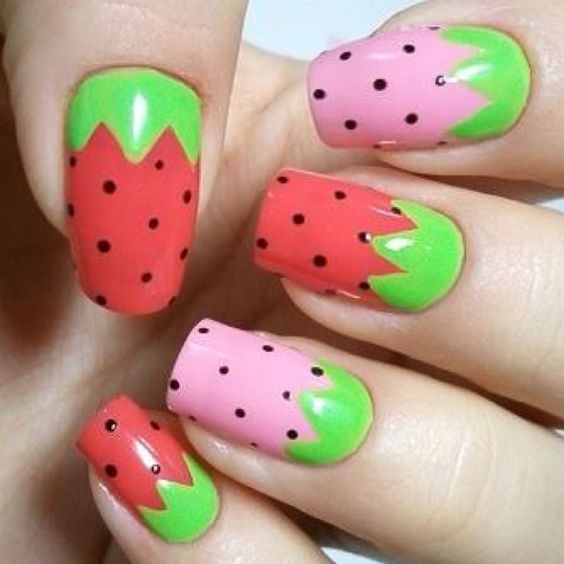
25Watermelon
This is a fun, fruity and simple design to do. It is ideal for beginners! All you will need is Burberry’s Iconic Colour polish in Rose Pink 400(1), Nails Inc’s Floral Street (white, 2), and their Black Taxi (3), and last but not least, Essie’s Mint Candy Apple (4).
1) Paint all your nails pink with polish 1.
2) Once they are dry, draw a line imitating the left curve of your nail in polish (4). Do this for all your nails.
3) Then, next to this green line, paint a white one imitating the curve of the green line you just drew. Repeat this step for all your nails.
4) Finally, add little black strokes for the seeds.
26Nautical Nails


The nautical look will never go out of style! Here is how you get the look!
1) Paint all your nails white.
2) Draw horizontal stripes in a navy blue onto your nail, not too many though so it doesn’t look too busy!
3) For the anchor, take a small dotting tool or a tiny brush and draw a circle with a bright red polish. Then at the bottom of the circle, draw a line that touches the last blue stripe you drew, before drawing the bottom of the anchor.
4) A few millimeters under the circle, draw a horizontal line in the red polish to finish off the anchor.
5) Then, to complete the look, put on a layer of transparent nail polish to conserve the layers!
27Strawberry Delight

Strawberry nails that look good enough to eat! What is the trick to getting this gorgeous strawberry texture? Use a pair of tweezers whilst your red polish is still wet! We also love the fact that you have two styles in one – a strawberry-inspired look plus a reverse manicure. It is so fun and fresh for the spring and summer! Check out the step by step guide to see how to do it!
28Mickey Magic

Who doesn’t love Disney? This look brings out your inner kid! For this look, you will need OPI’s Funny Bunny White, Essie’s No Place Like Chrome and Zoya’s shade Haley.
1) Paint one figure nail white, one metallic, and the rest red on each hand.
2) Once they are dry, on the white finger nail, draw a circle towards the tips of the finger nail, so that it doesn’t create an entire circle, but almost looks unfinished. To do this, use a metallic polish like No Place Like Chrome. Fill the circle in.
3) At the top, draw two smaller circles for the ears.
4) Then, with a dotting tool, or a bobby pin, dab white spots onto your red nails.
5) When they are all dry, add a transparent coat of polish and there you have it!
29Daisy Chains
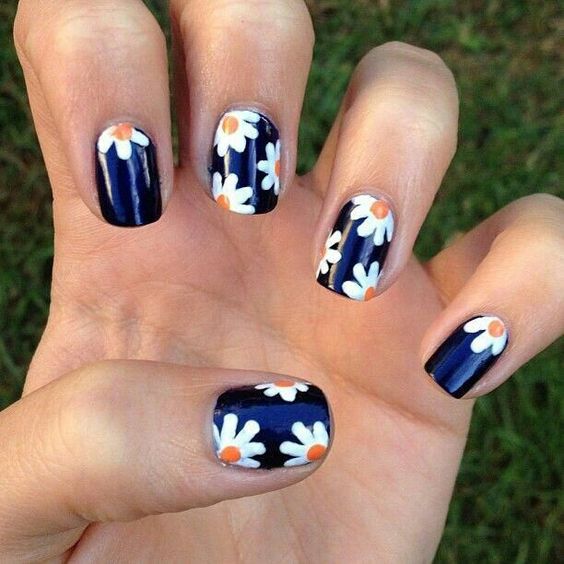
You can’t beat a floral design! Daisies get us lusting after those warmer months, and get us excited for what the year has to bring! They would look great with an all-black outfit, bringing a pop of color to your look. Check out the step by step guide to see how to do it, but trust us, it is very simple to do!
30Navy Blue

We have a look that you can definitely do for a special occasion. It is simple, classy, and sophisticated. Plus, with a bit of gold striping tape, it adds a subtle bit of glitter to the look. Though this could work every day too, it is the perfect manicure to do for a party! We imagine this with a cute coral dress to enhance the darkness of these nails.


